


Our new Rainman water maker
Having sailed a number of times extensively through Papua New Guinea between 2001 – 2009, I dealt with my onboard water issues like a single bloke at the time would…I showered by swimming every day and every couple of days would back that up with a quick quarter bucket rinse in the cockpit! I caught water when it (rarely) rained using tarps and hoses so I was able to add to my 300l water tank in a limited way.
Ultimately, this meant that water was a precocious commodity on board and I sometimes found locals asking for water on remote islands as they had run out during their dry seasons. It was the one thing I wished I had been able to not only have an abundance of for myself, but also to be able to share.
So, with advances in modern water makers, it seemed the time to get one onboard. It means daily hot showers and Tan really loves those and we can spend more time away from water sources such as marinas and means I no longer have to do dinghy load after dinghy load of water containers when a shore tap is located…not to mention, in remote areas where water is valuable, we’ll be able to share freely.
So, Raiman water makers ended up being our choice for the boat. As we already have an 8 Kva generator onboard, we opted for the 240v AC High Flow portable unit. At $7,500 or there about, it’s certainly not cheap, but friends of ours have one and they have never experienced and issue and the general feedback is that the Australian company that manufactures them is reliable and helpful. BTW, we have not received any benefit in writing this article about our Raiman, we paid the same as everyone else to get ours.
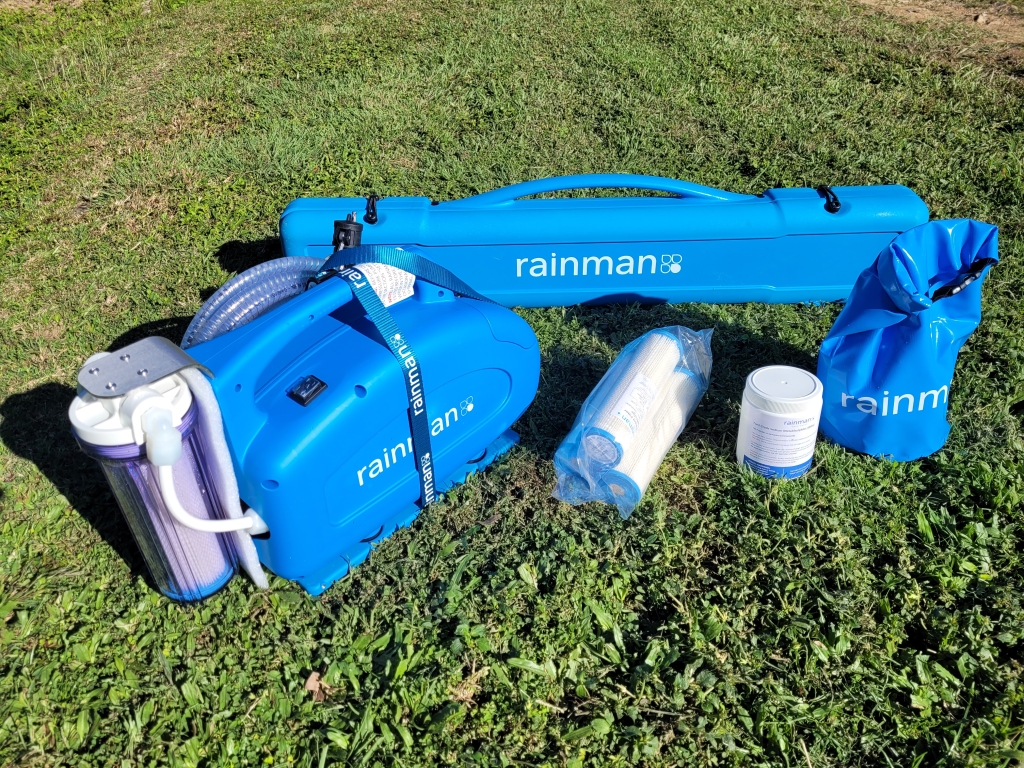
We received the Rainman water maker in two packages. Both quite heavy. One box contained the Compressor unit and the other the Reverse Osmosis tubes and case.
Rainman Portable AC High Flow
Unboxing
Unboxing was straight forward, so no need to include any of that here. One of the first things I noticed was that the instruction manual is clearly and very well written. There is no guessing here as to how to use initially prepare the Rainman, how to use it or how to store it for extended periods. Having a clearly and well written manual is a pleasure and should be the norm for all major purchases, but so often, it isn’t. Rainman should definitely take a bow for this.
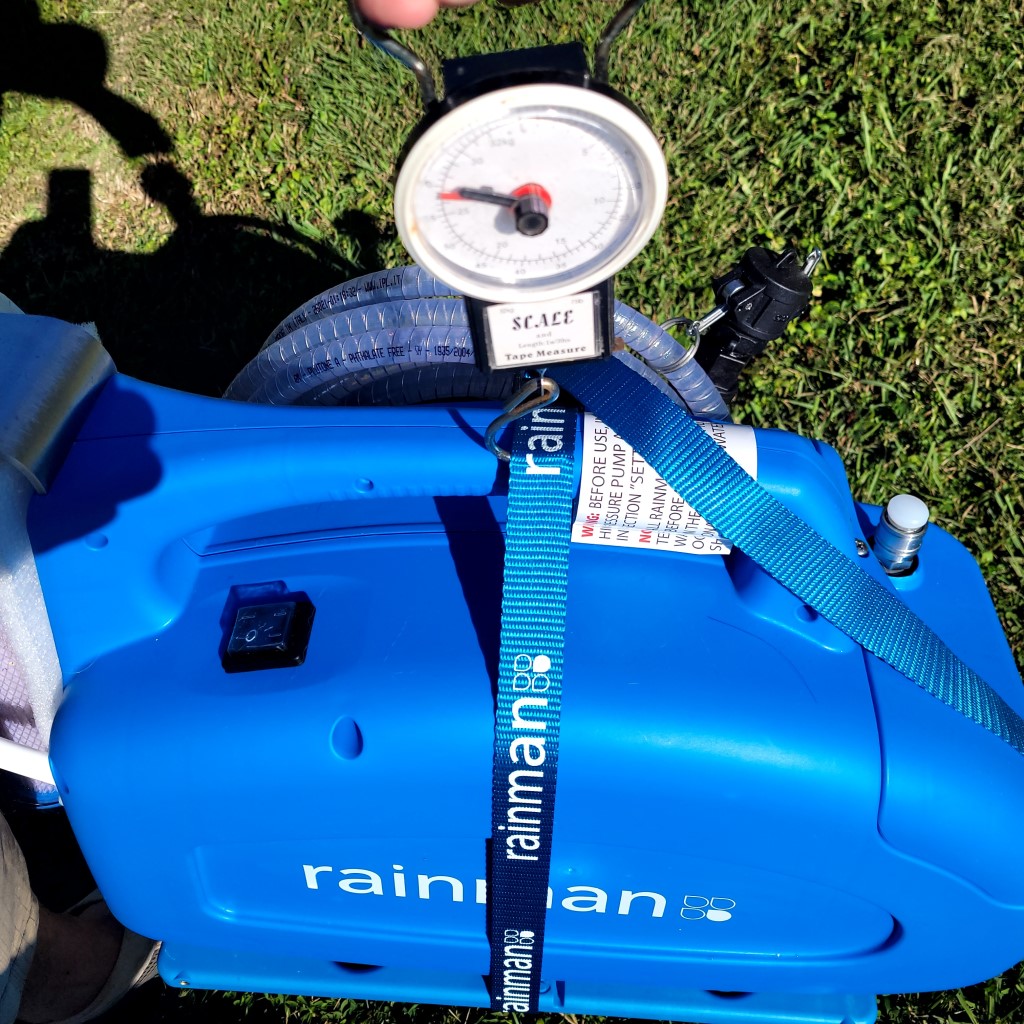
I was surprised at how heavy the units are, it’s definitely heavy. I weighed the compressor unit on my fishing scales at about 27kg, and the Reverse Osmosis pack at 21kg. So if you’re going to lug both of them around, to and from your boat at the marina for example, it’d be worth investing in a trolley. If the units are going to be stored on board, consider storing them in a locker up top, rather than stowed away under your v-berth up forward. Dragging them around the boat ,might be a struggle for those a little less limber.
The main Compressor unit weighs in around a hefty 27kg
The units are well built with quality parts and definitely designed for the marine environment. The design of the unit compacts a complex piece of modern machinery into a tiny form factor and so the unit may be heavy, but it is also small. I haven’t seen any other water makers that are as portable as this unit. So lets not whine too hard about the weight, it is manageable and I’d trade extra weight for a compact design and quality parts any day.
GOTCHA – One thing to remember when you first get your unit, there are warnings throughout the manual and also as a label on the compressor itself – change the oil cap from the sealed one designed to keep all the oil in during shipping to the breather type shipped with the unit. If you don’t do this, the oil may have issues flowing as the compressor is running and you could cause damage to the compressor.
There were mounts for the Reverse Osmosis case and the Compressor case included with our unit and we’ve fitted them inside one of our cockpit lockers where the unit will live and operate from. If we ever need to take it ashore, we can simply unstrap it and off we go. It’s a simple and effective design and thoughtful on behalf of Rainman. It’s the little pieces of attention to detail that makes the price of this unit easier to swallow.
Also included with the unit were 4 spare sediment filters. Ideally, you’d only use this in the clearest water you can, but not every anchorage is perfect and over time, we’re sure we’ll need the extra filters. Also included was a pickling solution and a handy water proof bag. Having them included is again, a testament to the thoughtfulness of Rainman. There’s nothing more you need to make this unit run and to keep it running for quite some time.
Operation
The manual says (after replacing the oil filler breather cap) it’s very straight forward.
- Connect the strainer to the inlet hose attached to the Compressor Unit and drop it in the sea.
- Attached the high pressure hose from the Compressor to the Reverse Osmosis filter.
- Drop the brine hose back overboard or somewhere it can drain.
- Drop the product water hose overboard or somewhere it can drain.
- Turn the pressure valve all the way ant-clockwise
- Turn on the compressor
- Slowly turn the pressure valve clockwise until the recommended pressure is shown on the gauge attached.
- After about 30 seconds, fresh, clean product water should be flowing from the product hose. Once you check it’s all good, drop it in your tank filler or jerry cans as required.
Our unit is rated at 140 liters per hour, however, I suspect this won’t actually be quite achieved but we’ll see when I do the first test!